이 포스팅은 한국어, 영어로 적혀 있습니다. 위 셀렉트 박스에서 언어 설정이 가능합니다. 형편없는 영어 실력 양해 바랍니다.
This posting is written in both Korean and English. You can select language with ‘select box’, above this article. excuse my poor english.
프로젝트 개요
이 프로젝트는 네이버 블로그의 포스팅을 html포맷으로 백업하는 크롤러를 만드는 것입니다. 포스팅에 포함된 글, 그리고 이미지도 저장하여 완전히 백업하는것이 목표입니다.
참고 및 사용 라이브러리
-
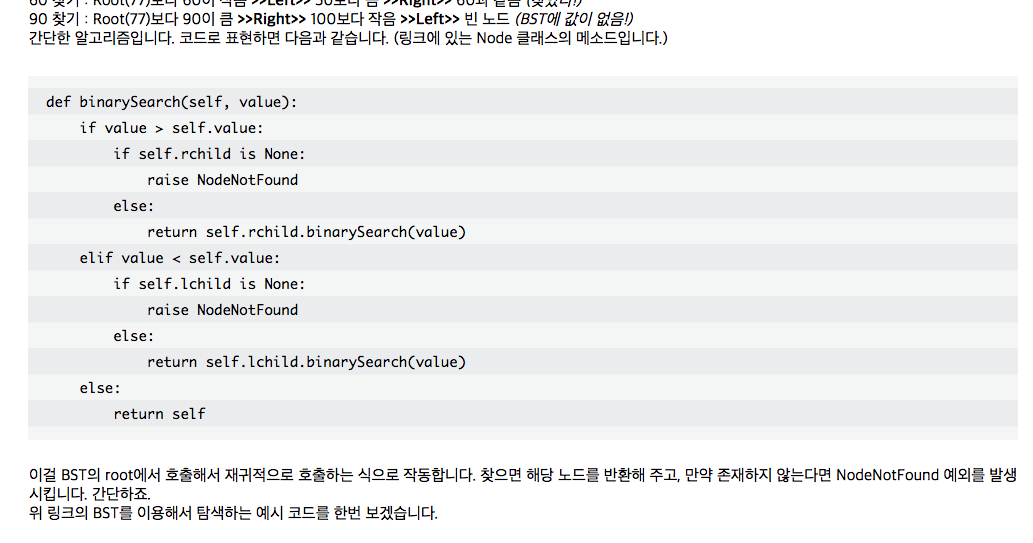
Beautiful Soup
파이썬의 크롤링 라이브러리입니다. 태그, 클래스 별 탐색 기능이 포함되어 있습니다. -
progress2
파이썬의 진행 막대 라이브러리입니다. 백업 상황을 보여주기 위해 사용했습니다.
Getting Started
![]()
PyPI에 올라가 있습니다. pip으로 설치하실 수 있습니다.
$ pip install NaverBlogBackup
$ pip3 install NaverBlogBackup
혹은 직접 tar 파일을 받으신 후 설치하시면 됩니다.
$ pip install ./NaverBlogBackup-"lastest-version".tar.gz
$ pip3 install ./NaverBlogBackup-"lastest-version".tar.gz
사용법
아직 GUI나 콘솔에서 바로 실행 가능하지 않으므로 파이썬 스크립트를 만들어서 실행해주셔야 합니다.
from NaverBlogCrawler import NaverBlogCrawler as nblog

if __name__ == "__main__":
    crawler = nblog.NaverBlogCrawler("your_naver_ID")
    crawler.run()
다음과 같이 파이썬 스크립트를 만들어 실행하신다면 해당 디렉토리에 post 폴더를 만들어 백업이 될 것입니다.
실행 예
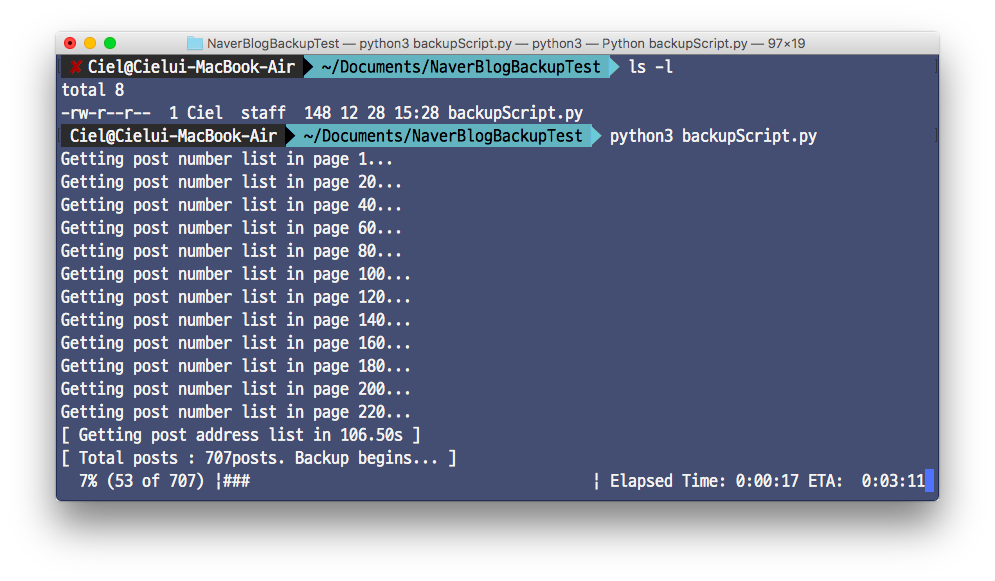 위와 같은 파이썬 스크립트를 실행하였을 때의 스크린샷입니다.
 백업된
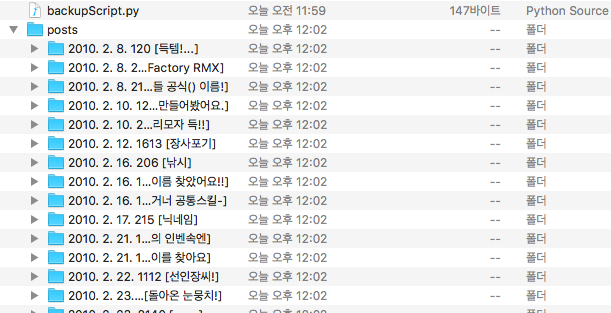
백업된 post/ 내부입니다. 포스트 별로 디렉토리를 만들어줍니다.
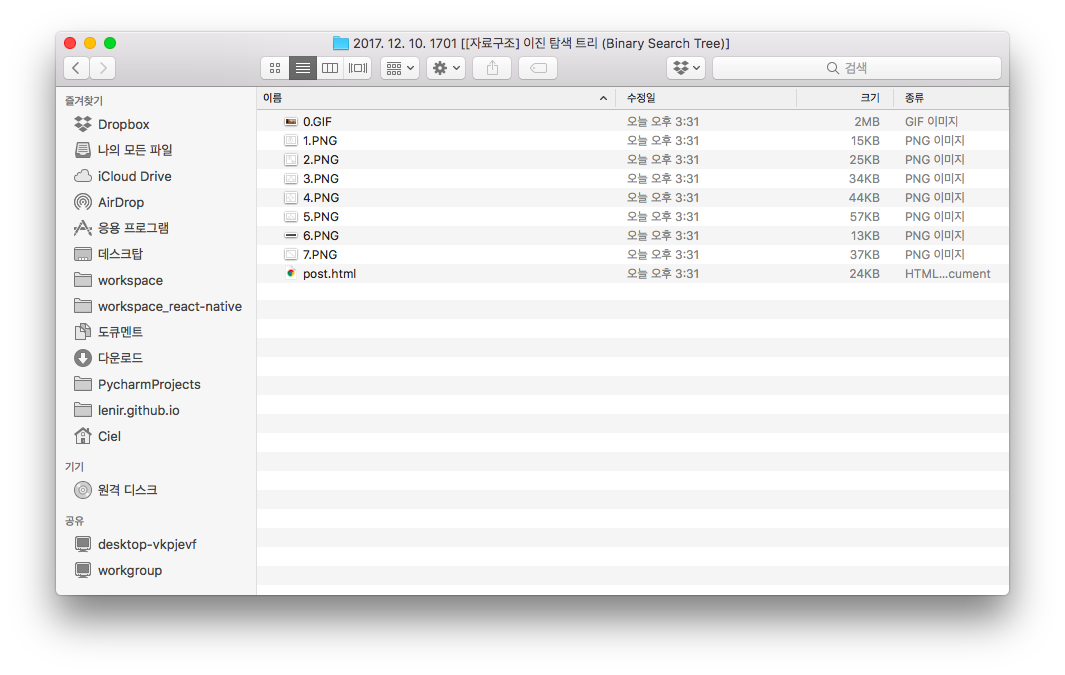 포스트 별 폴더 내부입니다. 이미지는 따로 저장되고 html은
 post.html로 저장됩니다.
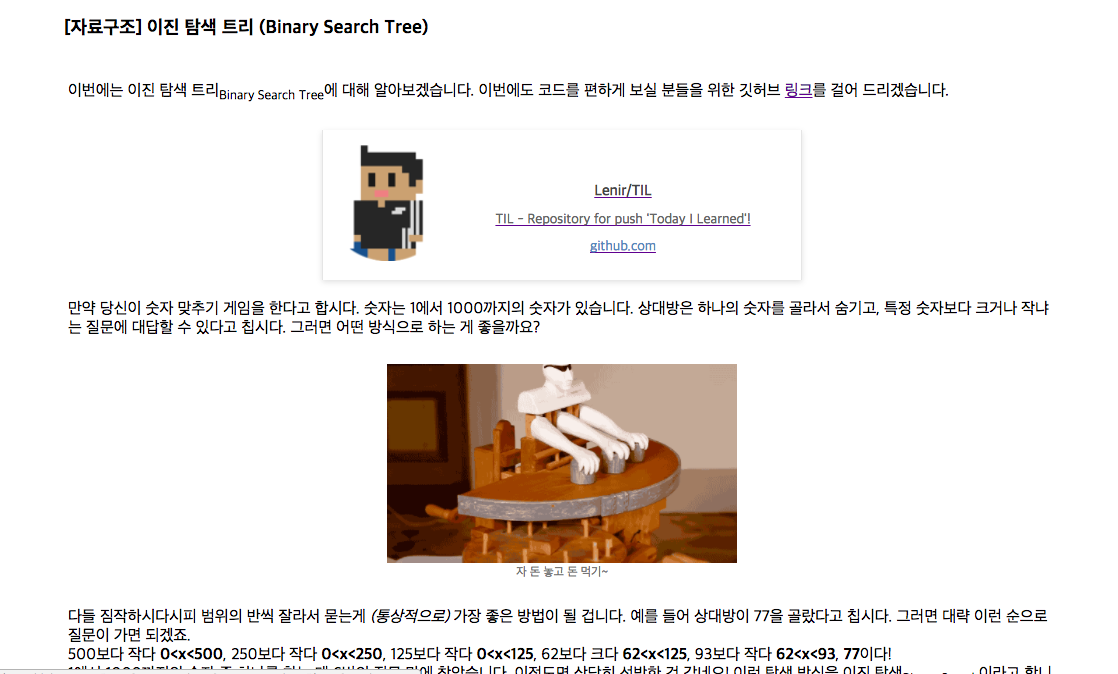
post.html 실행 예시입니다. 해당 포스트의 원본은 이렇습니다. 거의 대부분 그대로 저장됩니다.
 위 포스트에 있는 Code Component입니다. 이는 네이버 블로그에 원래 있던 css파일의 코드 컴포넌트 부분을 가지고 왔습니다.
이 포스팅은 한국어, 영어로 적혀 있습니다. 위 셀렉트 박스에서 언어 설정이 가능합니다. 형편없는 영어 실력 양해 바랍니다.
This posting is written in both Korean and English. You can select language with ‘select box’, above this article. excuse my poor english.
Project Summary
This Project is making Crawler that backups Naver Blog’s posting in html format. Goal is completely backup postings include its image.
Library Used
-
Beautiful Soup
Python’s Crawling lib. Can find page’s source in tag, class’ name. -
progress2
Python’s Progress bar lib. I used it for showing backup progress status.
Getting Started
![]()
This project uploaded on PyPI. You can install with pip easily!
$ pip install NaverBlogBackup
$ pip3 install NaverBlogBackup
Or you can install with tar file on hard way.
$ pip install ./NaverBlogBackup-"lastest-version".tar.gz
$ pip3 install ./NaverBlogBackup-"lastest-version".tar.gz
Usage
I didn’t implement it with running directly on console neither GUI. You have to write python script and run it.
from NaverBlogCrawler import NaverBlogCrawler as nblog

if __name__ == "__main__":
    crawler = nblog.NaverBlogCrawler("your_naver_ID")
    crawler.run()
When you run script like above code area, it’ll backups your postings on post directory.
Examples
This is screenshot when run above python script.
Inside of post/ directory. It makes directory for each posting backups.
Inside of posting directory. Html backup saved in post.html and image also saved with it.
This is capture of post.html. This backup’s original page is like this. It looks pretty same.
Code Component in above posting. I use css file’s code component part on Naver Blog’s page code.